When planning a tile installation project, one of the most common questions homeowners ask is: “How long will this actually take?” Whether you’re renovating a bathroom, updating your kitchen backsplash, or installing new flooring throughout your home, understanding the timeline can help you plan accordingly and set realistic expectations.
The duration of a tile project depends on several factors, including room size, surface preparation requirements, tile complexity, and whether you’re hiring professionals or tackling it yourself. Let’s break down what you can expect for different rooms in your home.
Bathroom Tile Projects: What to Expect
Bathroom tiling is one of the most popular renovation projects, but timelines can vary significantly based on the scope of work.
Small bathroom floor: For a typical 5×8 foot bathroom floor with straightforward tile patterns, expect 2-3 days for professional installation. This includes surface preparation, laying tiles, grouting, and curing time. DIY projects typically take 4-5 days, allowing extra time for learning curves and working around your schedule.
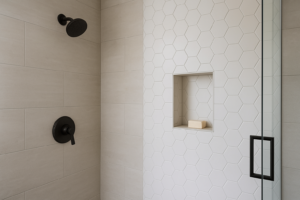
Full bathroom renovation: When you’re tiling both floors and walls, including a shower surround, the timeline extends considerably. Professional installers usually need 5-7 days to complete a full bathroom. This accounts for waterproofing, setting tiles in sections to avoid disturbing work, and proper drying times between stages. DIY enthusiasts should budget 2-3 weeks, working on weekends and evenings.
Shower or tub surround only: A standalone shower tile project takes approximately 3-4 days professionally, or 1-2 weeks for DIYers. The critical factor here is waterproofing, which must cure properly before tile installation begins.
Kitchen Tile Installation Timelines
Kitchen projects come in various sizes, from small backsplashes to complete floor renovations.
Backsplash installation: This is one of the quickest tile projects you can undertake. A standard kitchen backsplash (approximately 30 square feet) takes professionals just 1-2 days to complete. DIY installation typically requires a long weekend – one day for tile setting and another for grouting and cleanup.
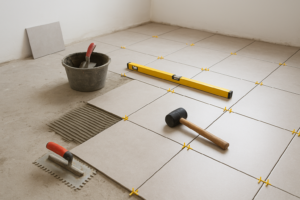
Kitchen floor tiling: An average-sized kitchen floor (120-150 square feet) requires 3-4 days for professional installation. The process involves removing old flooring, preparing the subfloor, laying tiles, and grouting. DIY projects generally take 5-7 days, spread over multiple weekends.
Living Areas and Large Spaces
Larger rooms present unique challenges and require more time investment.
Living room or open-concept spaces: For spaces ranging from 200-400 square feet, professional teams need approximately 4-6 days. The timeline increases with room size and complexity. Intricate patterns, multiple tile sizes, or diagonal layouts add 1-2 days to the project. DIY installation in these spaces typically takes 2-3 weeks.
Entryways and hallways: These smaller areas (50-100 square feet) can be completed in 2-3 days professionally, or over a long weekend for experienced DIYers.
Factors That Impact Your Timeline
Several variables can extend or shorten your project duration:
Surface preparation: This is often the most underestimated phase. Removing old tile, repairing subfloors, or addressing moisture issues can add several days to your timeline. Some projects require 2-3 days of prep work before a single tile is laid.
Tile type and pattern: Large-format tiles generally install faster than small mosaics. Simple grid patterns are quicker than herringbone, chevron, or custom designs. Intricate patterns can increase installation time by 30-50%.
Drying and curing time: This is non-negotiable. Thinset mortar needs 24-48 hours to cure before grouting. Grout requires another 24-72 hours before the surface can handle foot traffic. Rushing these steps compromises your installation and can lead to cracked tiles or failed grout lines.
Obstacles and cuts: Rooms with many corners, fixtures, or irregular shapes require more tile cuts, which slows the process. Bathrooms with toilets, vanities, and tubs have more obstacles than open floor plans.
Professional vs. DIY: Time Comparison
| Project Type | Professional Timeline | DIY Timeline |
|---|---|---|
| Small bathroom floor (40 sq ft) | 2-3 days | 4-5 days |
| Full bathroom (floor + walls) | 5-7 days | 2-3 weeks |
| Kitchen backsplash (30 sq ft) | 1-2 days | 2-3 days |
| Kitchen floor (150 sq ft) | 3-4 days | 5-7 days |
| Living room floor (300 sq ft) | 4-6 days | 2-3 weeks |
| Shower surround only | 3-4 days | 1-2 weeks |
Planning for Disruption
Beyond installation time, consider how the project will impact your daily life. Bathrooms become unusable during renovation, so you’ll need alternative arrangements. Kitchen projects may require setting up a temporary cooking space. Add buffer time to your estimates – unexpected issues like water damage or uneven subfloors are discovered in about 30% of tile projects.
For professional installations, contractors typically work 6-8 hours per day. DIY projects progress more slowly since you’re likely working evenings and weekends around other obligations. Factor in time for material delivery, tool rental, and those inevitable trips back to the hardware store for supplies you forgot.
Tips to Keep Your Project on Schedule
Order materials early: Tile, grout, and supplies should arrive before your start date. Back-ordered materials can delay projects by weeks.
Prepare the space: Remove furniture, fixtures, and old flooring before installation day. This prep work can save 1-2 days on professional projects.
Respect curing times: Don’t walk on freshly laid tile or rush the grouting process. Patience during these phases prevents costly repairs later.
Have a contingency plan: If tiling your only bathroom, arrange alternative shower facilities. For kitchen projects, set up a microwave and coffee maker elsewhere.
Frequently Asked Questions
Can I walk on tile immediately after installation?
No, you should wait at least 24-48 hours after tile installation before walking on it, and 72 hours before placing heavy furniture. Grout needs additional curing time – typically 24-72 hours before light foot traffic and up to two weeks before it reaches full strength.
Why does tile installation take so long?
The majority of time goes to proper preparation and curing. Surface prep ensures tiles adhere correctly, while adequate drying time between layers (thinset, grout, and sealant) prevents future problems. Rushing these steps leads to loose tiles, cracked grout, and water damage.
How can I speed up my tile project?
Choose larger tiles with simpler patterns, ensure all materials are on-site before starting, properly prepare surfaces in advance, and consider hiring professionals for complex areas like showers. However, never compromise on curing times to speed up the project.
What’s the fastest tile project I can do in a weekend?
A small backsplash (15-30 square feet) with straightforward tile and minimal cuts can be completed over a weekend. Saturday for tile installation and Sunday for grouting and cleanup. Ensure you have all materials and tools beforehand.
Do I need to leave my home during tile installation?
Not necessarily, but expect dust, noise, and limited access to the work area. Professional installers work during business hours, so you can leave for work as normal. The main inconvenience is losing access to that room – particularly challenging for single-bathroom homes.
How long before I can use my newly tiled shower?
Wait at least 72 hours after grouting before using a tiled shower. Some professionals recommend waiting up to a week to ensure the grout and any sealants have fully cured. Using the shower too early can cause water to penetrate behind tiles, leading to mold and structural damage.
Final Thoughts
Tile installation is a time-intensive process that rewards patience and proper planning. While it might be tempting to rush through stages, respecting the necessary preparation and curing times ensures your beautiful new tiles will last for decades. Whether you hire professionals or go the DIY route, understanding realistic timelines helps you plan your renovation with minimal stress and maximum results.
Remember that every project is unique. These timelines are estimates based on typical conditions. Your specific situation – including the condition of existing surfaces, tile choices, and pattern complexity – will influence your actual timeline. When in doubt, consult with a professional tile installer who can assess your space and provide a more accurate estimate.