Spring is the perfect time to breathe new life into your home with a tile renovation project. Whether you’re updating a bathroom, refreshing your kitchen backsplash, or creating an outdoor oasis, proper planning is essential for success. This comprehensive checklist will guide you through every stage of your spring tile project, from initial planning to final installation.
Assessing Your Space and Setting Goals
Before diving into your renovation, take time to evaluate your current space. Walk through the area you plan to tile and identify what’s working and what needs improvement. Consider factors like water damage, outdated design, or functional issues that need addressing. Document everything with photos and measurements – these will prove invaluable when shopping for materials and consulting with contractors.
Set clear, realistic goals for your project. Are you looking to increase your home’s resale value, improve functionality, or simply update the aesthetic? Understanding your priorities will help guide decisions about budget, materials, and design choices throughout the renovation process.
Creating Your Budget and Timeline
Establishing a budget early prevents overspending and helps prioritize expenses. Research average costs for materials and labor in your area, then add a contingency fund of 15-20% for unexpected issues. Remember that tile projects often reveal hidden problems like water damage or outdated plumbing that may need attention.
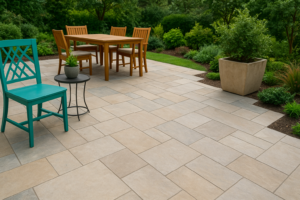
Spring renovations can be time-sensitive, especially if you’re planning to enjoy outdoor spaces during summer months. Create a realistic timeline that accounts for material delivery, contractor availability, and potential weather delays. Most tile projects take anywhere from a few days to several weeks, depending on the scope and complexity.
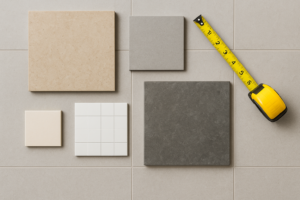
Choosing the Right Tile Materials
The tile market offers countless options, from classic ceramic and porcelain to natural stone and glass mosaics. Each material has unique characteristics that make it suitable for different applications. Porcelain tiles are highly durable and water-resistant, making them ideal for bathrooms and high-traffic areas. Natural stone tiles like marble or travertine add luxury but require more maintenance.
Consider practical factors beyond aesthetics. Think about slip resistance for bathroom floors, heat tolerance for areas near ovens or fireplaces, and maintenance requirements for your lifestyle. Don’t forget to account for grout selection – the right grout color and type can dramatically impact both appearance and longevity.
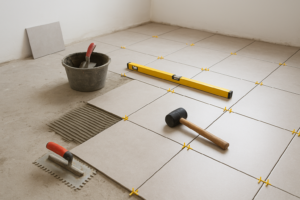
Essential Preparation Steps
Proper preparation ensures your tile installation stands the test of time. Start by removing existing flooring or wall coverings and inspecting the substrate beneath. The surface must be clean, level, and structurally sound before tile installation begins. Any damage, unevenness, or moisture issues should be addressed at this stage.
Gather all necessary tools and materials before starting. Basic tile installation requires a wet saw or tile cutter, trowels, spacers, levels, and safety equipment. If you’re hiring professionals, verify they have proper licensing and insurance. Request references and review their previous tile work to ensure quality craftsmanship.
Planning Your Design Layout
Design layout significantly impacts the final appearance of your tiled space. Experiment with different patterns – traditional grid, diagonal, herringbone, or chevron – using graph paper or digital design tools. Plan your layout to minimize awkward cuts and ensure symmetry in visible areas.
Consider where your eye naturally falls when entering the room. Center your most attractive tiles or patterns in these focal points. Think about transitions between rooms and how your tile choice will flow with adjacent flooring materials. Don’t forget practical elements like expansion joints and waterproofing in wet areas.
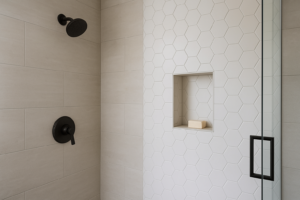
Understanding the Installation Process
Whether tackling installation yourself or hiring professionals, understanding the process helps ensure quality results. Installation typically begins with applying a suitable adhesive or thinset mortar to the substrate. Tiles are then set using spacers to maintain consistent grout lines, with careful attention to level and alignment.
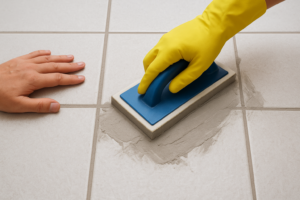
After tiles are set and the adhesive has cured (usually 24-48 hours), grouting fills the spaces between tiles. Proper grouting technique prevents water infiltration and contributes to the overall appearance. Finally, sealing may be necessary depending on your tile and grout selection, particularly for natural stone materials.
Avoiding Common Pitfalls
Many tile projects encounter preventable problems. Rushing the preparation phase often leads to poor adhesion or uneven surfaces. Skimping on waterproofing in bathrooms and kitchens can result in costly water damage down the line. Always verify that your substrate can support the weight of your chosen tile – heavy natural stone may require additional reinforcement.
Another common mistake is underestimating material quantities. Purchase 10-15% extra tiles to account for cuts, breakage, and future repairs. Keep leftover tiles stored safely for matching repairs years later. Poor ventilation during installation can extend drying times and affect adhesive performance, so ensure adequate airflow throughout the project.
Post-Installation Care and Maintenance
Once your beautiful new tiles are installed, proper care ensures they maintain their appearance for years. Allow adequate curing time before exposing tiles to heavy traffic or moisture. Follow manufacturer recommendations for initial cleaning and sealing.
Establish a regular maintenance routine appropriate for your tile type. Most tile surfaces benefit from regular sweeping or vacuuming and damp mopping with pH-neutral cleaners. Avoid harsh chemicals that can damage grout or tile finishes. Reseal grout lines periodically to maintain water resistance and prevent staining.
Frequently Asked Questions
How long does a typical tile renovation project take?
The timeline varies based on project scope, but most bathroom tile projects take 5-10 days, while kitchen backsplashes can be completed in 2-3 days. Larger projects like whole-floor renovations may take 2-3 weeks including preparation and curing time.
Can I tile over existing tile?
In some cases, yes, but it’s not always recommended. The existing tile must be firmly attached, level, and in good condition. This approach raises floor height, which can create transition issues with adjacent rooms. Consult a professional to assess whether your existing tile is suitable for overlay.
What’s the difference between ceramic and porcelain tile?
Both are made from clay, but porcelain is fired at higher temperatures, making it denser, harder, and more water-resistant. Porcelain is generally more durable and suitable for high-traffic areas, while ceramic is often more affordable and easier to cut.
Should I hire a professional or DIY my tile project?
This depends on your skill level, project complexity, and available time. Simple projects like small backsplashes can be suitable for confident DIYers. Complex layouts, large areas, or projects requiring waterproofing and substrate repair are best left to experienced professionals.
How do I choose the right grout color?
Consider whether you want grout to blend or contrast with your tiles. Matching grout creates a seamless look and hides minor imperfections, while contrasting grout highlights the tile pattern. Darker grout tends to show less staining over time than white or light-colored options.
Tile Type Comparison Chart
| Tile Type | Durability | Water Resistance | Maintenance | Cost Range | Best Used For |
|---|---|---|---|---|---|
| Ceramic | Good | Good | Low | $ | Walls, light-traffic floors |
| Porcelain | Excellent | Excellent | Low | $$ | All applications, high-traffic areas |
| Natural Stone | Good to Excellent | Moderate (needs sealing) | High | $$$ | Feature walls, luxury bathrooms |
| Glass | Moderate | Excellent | Moderate | $$-$$$ | Backsplashes, accent walls |
| Cement | Good | Good (needs sealing) | Moderate to High | $$ | Modern floors, walls |
Starting your spring tile renovation with a solid plan sets the foundation for success. By following this comprehensive checklist, you’ll navigate each phase of your project with confidence, avoiding common mistakes and achieving professional-quality results. Remember that patience and attention to detail during planning and preparation pay dividends in the finished product. Whether you choose to tackle the project yourself or work with experienced professionals, your thoughtfully renovated space will provide enjoyment and value for years to come.